

Garland for Graduation: The Ultimate Guide to Decorating, DIYing, and Styling Like a Pro
Garland for Graduation: The Ultimate Guide to Decorating, DIYing, and Styling Like a Pro
A graduation garland is one of the easiest, most affordable ways to transform any space into a celebration-worthy setup — and yet so many people either overthink it or completely underestimate how much it can do for their party’s vibe.
Sound familiar?
Maybe you’re staring at a blank wall trying to figure out how to make it look intentional. Maybe you’ve got $20 and a hot glue gun and no idea where to start. Or maybe you just want something that looks good in photos without hiring a decorator.
I’ve been there. And after styling and photographing more graduation setups than I can count, I can tell you this: the garland is always the thing people stop and notice first.
Let me walk you through everything — from picking your style and budget, to setting it up, shooting it, and even sharing it online.
What Kind of Graduation Garland Do You Actually Need?
Before you buy anything, let’s get clear on the two main ways a graduation garland works:
1. Decorative garlands — these go on walls, dessert tables, entryways, or photo backdrops.
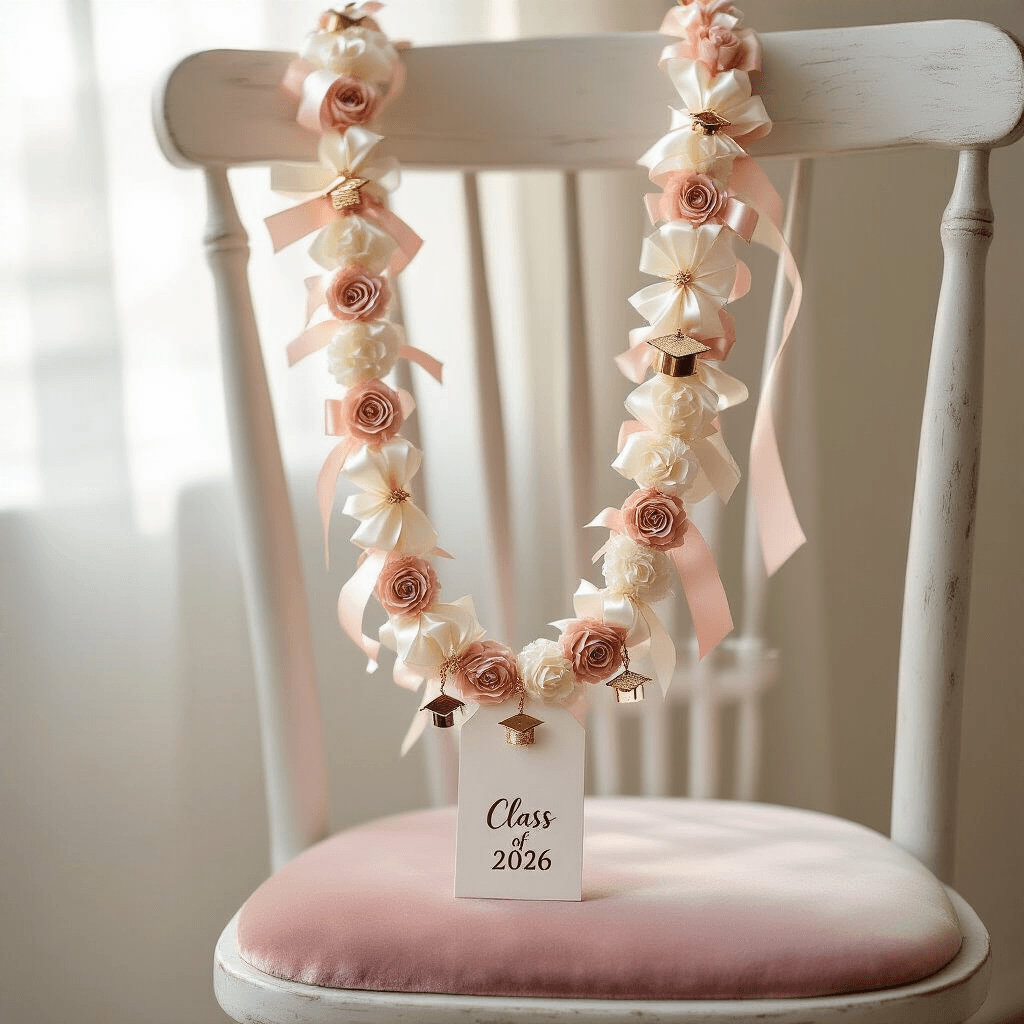
2. Wearable garlands — these are leis or ribbon garlands that the grad actually wears.
Both are completely valid. Both can be DIY or store-bought. And honestly, both can look stunning on a $20 budget if you know what you’re doing.
Here’s a quick breakdown of the most popular types:
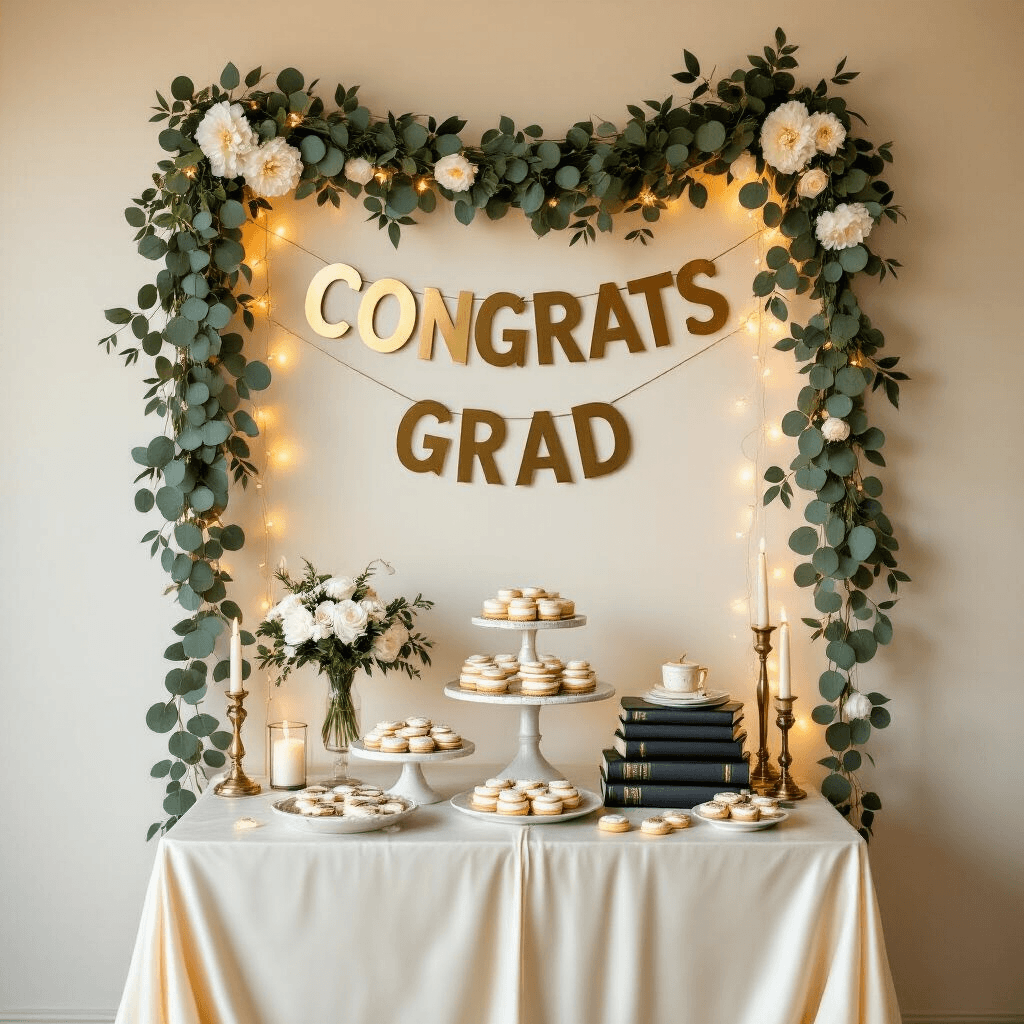
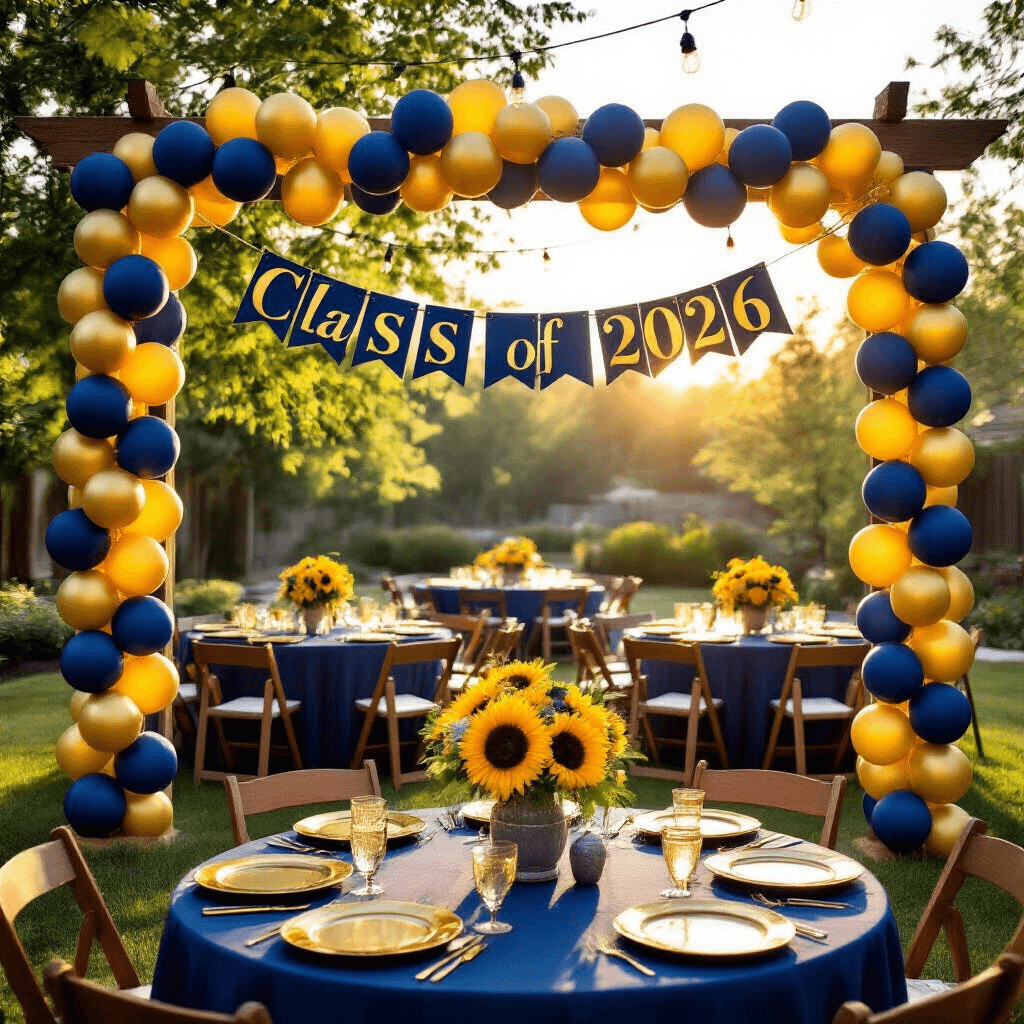
- Letter/banner garlands — spell out “Congrats Grad,” the grad’s name, or “Class of 2026”
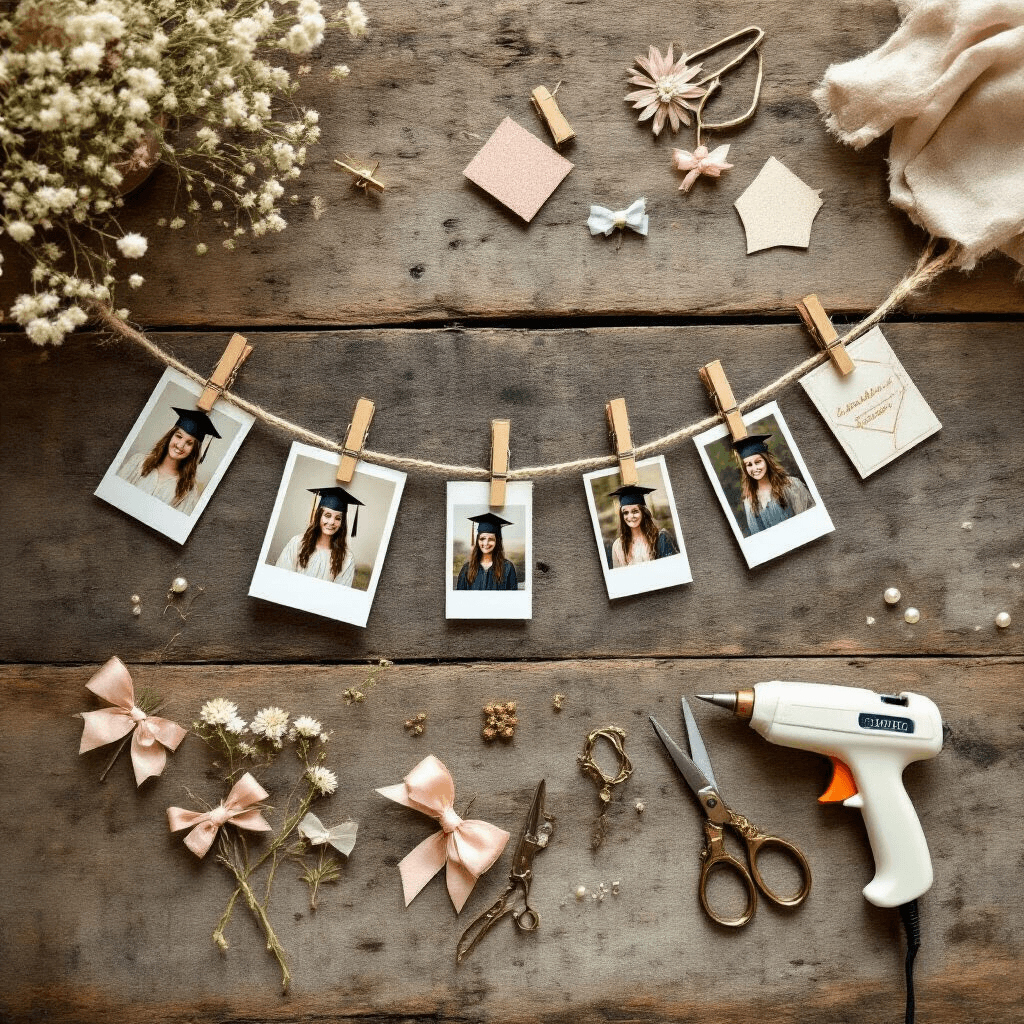
- Photo garlands — printed photos clipped or strung in chronological order from baby to graduation day
- Balloon garlands — clusters of balloons in school colors that frame a backdrop or doorway
- Paper chain garlands — classic, colorful, and stupidly easy to make
- Ribbon/lei garlands — worn by the grad for portraits and candid photos
- Greenery garlands — eucalyptus, ivy, or artificial florals with grad cap accents
How Much Will It Cost You? (Real Budget Breakdown)
Here’s the honest truth about graduation garland budgets:
Affordable ($5–$20)
- Paper chains in school colors
- Print-at-home letter banners on cardstock
- Basic twine and string from the dollar store
- Printed photos from your home printer
Mid-Range ($20–$60)
- Satin ribbon and felt bases for lei-style garlands
- Artificial florals or greenery accents
- Metallic balloon garland kits
- Pre-cut letter sets in gold or rose gold
Luxury ($80+)
- Custom laser-cut letter garlands
- Premium florals with a coordinated backdrop
- Branded “Class of [Year]” signage with professional printing
Most of my setups land somewhere in the mid-range, and they photograph beautifully. You do not need to spend a lot to make it look like you did.
How Long Does It Take? (No Sugarcoating)
I know you want to plan this properly, so here’s the real timing:
Simple letter banner or photo garland:
- Prep + assemble: 20–40 minutes
- Setup and hanging: 10–15 minutes
Elaborate balloon + garland wall with layered ribbons and floral accents:
- Expect 1–2 hours from start to finish
Photography (if you’re capturing it for a blog, reel, or social post):
- Detail and styled shots: ~30 minutes
- Candids and party coverage: ~30–60 minutes
- Editing: 30–60 minutes depending on how many images
Full content creation (blog + social media):
- Plan for a full day spread across planning, styling, shooting, and editing
What You’ll Need: The Complete Materials List
The Essentials
- Cardstock paper — for letters, graduation caps, and diploma shapes
- Twine or string — for hanging letter garlands and photo strings
- Printed photos — from early childhood through graduation day
- Scissors, tape, glue, and a hole punch — the basics
- Command hooks or removable putty — for attaching garlands without damaging walls
- Satin ribbon and felt — for wearable lei-style garlands
- Artificial flowers or greenery — for an elegant, layered look
Nice-to-Have
- Fairy lights — weave them behind or through the garland for evening parties
- A fabric or shimmer backdrop curtain — gives the garland a clean, polished background
- Glitter cardstock — for mini diplomas, grad caps, or year numbers
- Metallic foil tassels — add a celebratory finishing touch
- One softbox or LED light panel — if you’re shooting indoors
Budget-Friendly Swaps
- Use natural window light instead of ring lights or studio equipment
- Reuse holiday fairy lights you already own
- Skip the custom backdrop — a simple neutral wall or fabric drape

")


