

My Guide to Creating Pinterest-Worthy Outdoor Wedding Magic
My Guide to Creating Pinterest-Worthy Outdoor Wedding Magic
Contents
- My Guide to Creating Pinterest-Worthy Outdoor Wedding Magic
- Why Your Backyard Might Be Better Than Any Fancy Venue
- Planning Your Outdoor Wedding Timeline (Without Losing Your Mind)
- Choosing Your Color Palette (The Make-or-Break Decision)
- Essential Tools That Won’t Break Your Budget
- Lighting: The Secret Sauce of Romantic Outdoor Weddings
- Creating Your Ceremony Focal Point
Outdoor wedding planning can feel overwhelming when you’re staring at an empty backyard wondering how on earth you’ll transform it into something worthy of your Pinterest boards.
Trust me, I’ve been there.
Standing in my own garden three years ago, armed with nothing but a dream and a seriously tight budget, wondering if I could actually pull off the romantic outdoor ceremony I’d been pinning for months.
Here’s what I wish someone had told me back then.

Why Your Backyard Might Be Better Than Any Fancy Venue
I spent weeks touring expensive venues before I realized the answer was literally in my backyard.
Your outdoor space has something those cookie-cutter venues don’t – your personality.
Plus, you control everything:
- The timeline (no rushing because another wedding starts at 6 PM)
- The budget (goodbye, $10,000 venue fees)
- The vibe (string lights at 2 AM? Absolutely)
Planning Your Outdoor Wedding Timeline (Without Losing Your Mind)
Let me break down the real timeline you need:
6-8 Hours Before Guests Arrive
- Set up ceremony focal point
- Arrange reception tables
- Test all lighting systems
4-6 Hours for Full Styling
This includes:
- Ceremony arch setup (2 hours if you’re doing florals)
- Reception table styling (1-2 hours per table area)
- Detail arrangements (signage, bar setup, welcome table)
1-2 Hours for Simple Vignettes
Perfect if you’re just doing ceremony or cocktail hour styling.
Pro tip: I learned this the hard way – always add an extra hour to whatever you think you need.

Choosing Your Color Palette (The Make-or-Break Decision)
Your color palette will either make your photos look like a magazine spread or like a chaotic craft store explosion.
Foolproof Color Combinations That Always Work
Soft Neutrals (my personal favorite):
- Ivory
- Sand
- Warm gray
- Eucalyptus green
Romantic Pastels:
- Blush
- Dusty rose
- Champagne
- Sage
Modern Classic:
- White
- Black
- Taupe
- Olive green
- Metallic gold
The golden rule: Pick 1-2 main colors plus 2-3 supporting neutrals. That’s it.
I see couples trying to incorporate six different colors and wondering why nothing looks cohesive.

Essential Tools That Won’t Break Your Budget
Photography Equipment
You don’t need a $3,000 camera setup.
Minimum requirements:
- Smartphone with clean lens (seriously, clean it)
- Tripod for steady shots
- White foam board reflector (game-changer for natural light)
Styling Props That Do Heavy Lifting
Ceremony must-haves:
- Arch or backdrop (rental or DIY)
- Wooden cross-back chairs or simple white folding chairs
- Aisle markers (hurricane vases work beautifully)
Reception essentials:
- Table linens in your color palette
- Mix of candleholders (different heights)
- Simple centerpiece vessels

Lighting: The Secret Sauce of Romantic Outdoor Weddings
Lighting makes or breaks outdoor wedding photos.
Golden Hour Is Your Best Friend
Plan your ceremony 1-2 hours before sunset. The light is soft, warm, and forgiving.
String Light Strategy
Warm white string lights create instant ambiance.
Where to hang them:
- Between trees (if you have them)
- From your house to a tall pole (rent or buy a simple light pole)
- Over the reception area in a zigzag pattern
Candle Safety for Outdoor Events
Real candles look gorgeous but can be dangerous outdoors.
Smart alternatives:
- LED candles in glass hurricanes
- Battery-operated fairy lights in mason jars
- Solar-powered lanterns for pathway lighting

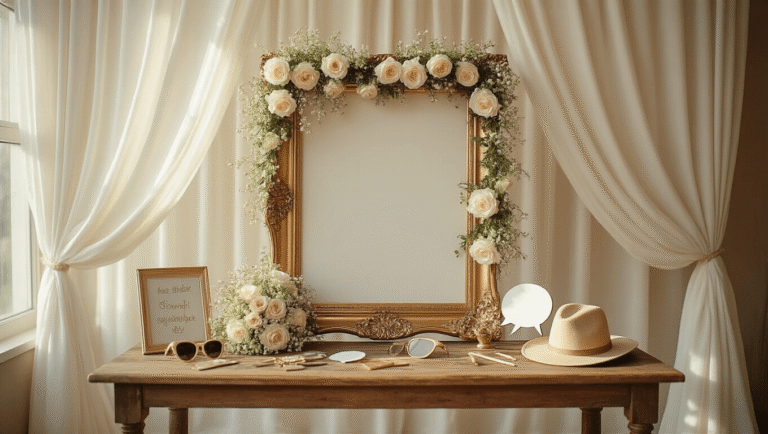
Creating Your Ceremony Focal Point
This is where guests will look for 30+ minutes, so it needs to be stunning.

")
")

