

Create the Perfect Barbie Balloon Garland That’ll Make Every Little Princess Squeal with Joy
Create the Perfect Barbie Balloon Garland That’ll Make Every Little Princess Squeal with Joy
Contents
- Create the Perfect Barbie Balloon Garland That’ll Make Every Little Princess Squeal with Joy
- Why Your Next Party Needs This Pink Perfection
- The Magic Formula: Colors That Pop Like a Fashion Magazine
- Size Matters: The Balloon Hierarchy That Creates Visual Drama
- Building Your Barbie Masterpiece: Step-by-Step Without the Stress
- Installation: Making It Stick Without the Stress
- The Finishing Touches That Scream Barbie Glam
- When DIY Isn’t Your Thing: Smart Shopping Alternatives
I’ve thrown my fair share of birthday parties, and nothing—and I mean NOTHING—makes a bigger impact than a stunning Barbie balloon garland cascading across your party space like a pink dream come to life.
You know that moment when your daughter walks into the room and her eyes go wide? That’s the magic we’re after.

Why Your Next Party Needs This Pink Perfection
Let me guess what you’re thinking right now:
- “This looks way too complicated for someone like me”
- “I’ll probably mess it up and waste a bunch of money on balloons”
- “There has to be an easier way to create that wow factor”
I get it. I’ve been there, standing in the party supply aisle feeling completely overwhelmed.
But here’s what I discovered after creating dozens of these showstoppers: Barbie balloon garlands are actually much simpler than they look once you know the secret formula.
The Magic Formula: Colors That Pop Like a Fashion Magazine
The secret sauce isn’t just throwing pink balloons together and hoping for the best.
Your Essential Color Palette:
- Hot pink (this is your star player)
- Fuchsia (adds depth and drama)
- Chrome pink (brings that metallic magic)
- Silver (the sophisticated accent that ties everything together)
I learned this the hard way after my first attempt looked more like cotton candy explosion than couture creation.
Pro tip: Grab a balloon color variety pack instead of buying individual colors. Trust me on this one—you’ll save money and get better color coordination.
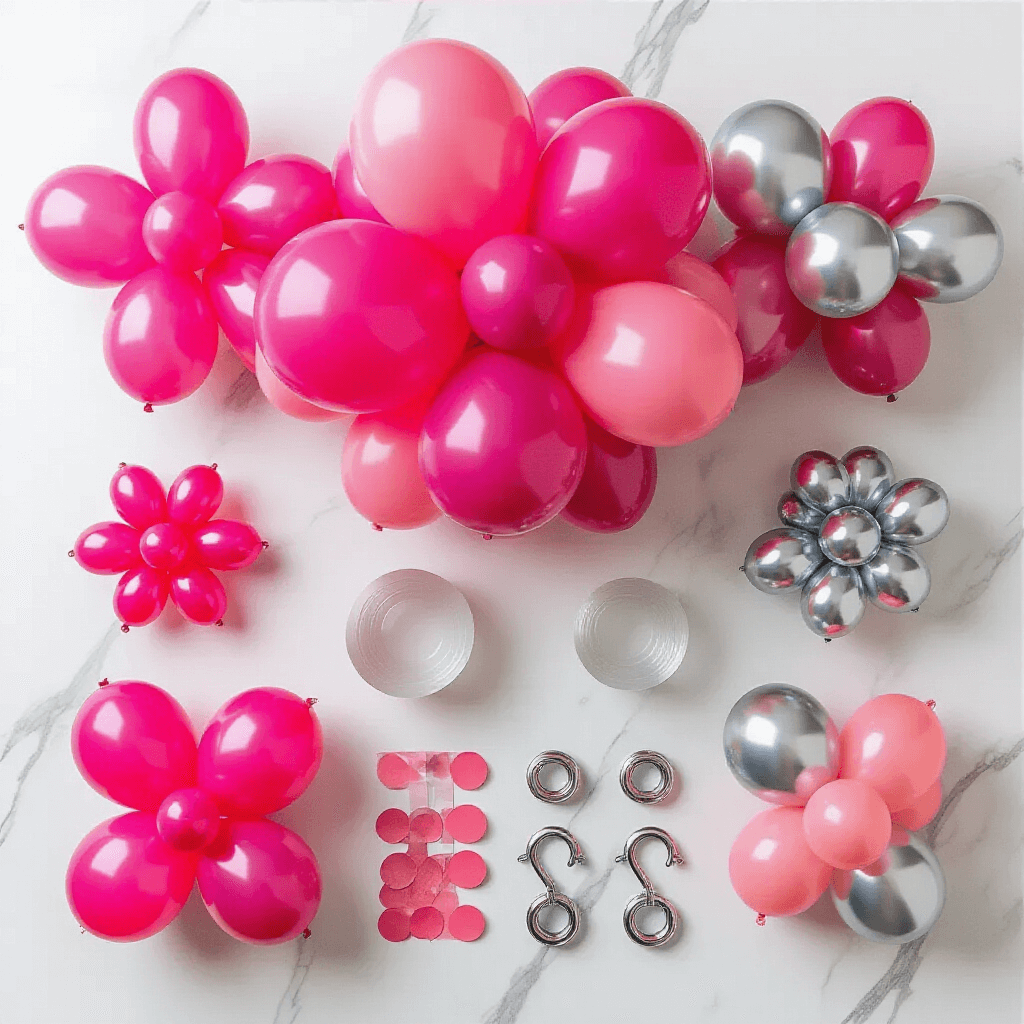
Size Matters: The Balloon Hierarchy That Creates Visual Drama
Here’s where most people go wrong—they use all the same size balloons and wonder why their garland looks flat.
Your Size Strategy:
- 36-inch balloons: Your anchor pieces (use sparingly)
- 24-inch balloons: Main volume creators
- 17-inch balloons: Perfect middle ground
- 11-inch balloons: Your workhorses
- 5-inch balloons: Gap fillers and texture makers
Think of it like orchestrating a symphony—every size has its role to play.
Building Your Barbie Masterpiece: Step-by-Step Without the Stress
Step 1: Create Your Foundation Clusters
This is where the magic starts happening.
What you’ll do:
- Inflate pairs of balloons in the same size
- Twist the necks together (we call these “dupes”)
- Combine 4-5 dupes into clusters
- Aim for 16-18 balloons per cluster for smaller sizes
I like to make all my clusters first before connecting anything. It’s like meal prep—do the tedious work upfront, then assembly becomes a breeze.
Step 2: Connect with Purpose
Here’s where that 260 modeling balloon pack becomes your best friend.
The Connection Method:
- Tie the necks of balloons from different clusters together
- Use the 260 balloons as flexible connectors
- Wrap them around clusters like rubber bands
- Keep everything loose enough to adjust as you build
Step 3: Add Volume Like a Pro
This step separates amateur attempts from professional-looking displays.
Volume-Building Secrets:
- Attach smaller clusters to your main garland base
- Use 5-inch balloons to fill awkward gaps
- Layer different sizes for dimensional depth
- Step back frequently to check your progress
The key is building gradually. Don’t try to create perfection in one go.
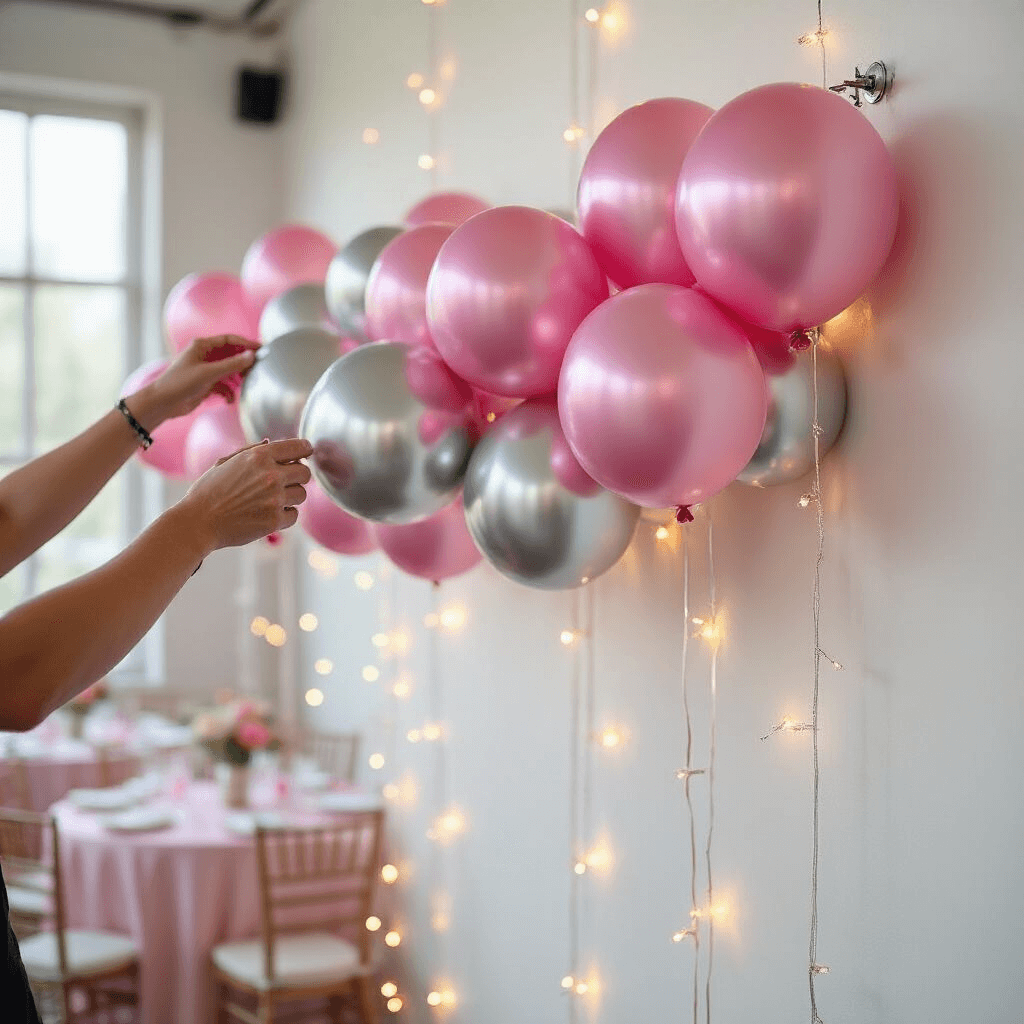
Installation: Making It Stick Without the Stress
I’ve watched too many beautiful garlands crash to the floor because of poor installation planning.
Your Mounting Strategy:
- Plan 3-4 connection points minimum
- Use strong adhesive hooks for walls
- Test your mounting points with weight before final installation
- Have clear packing tape as backup support
Pro installation tip: Mount your heaviest sections first, then work toward the lighter ends.
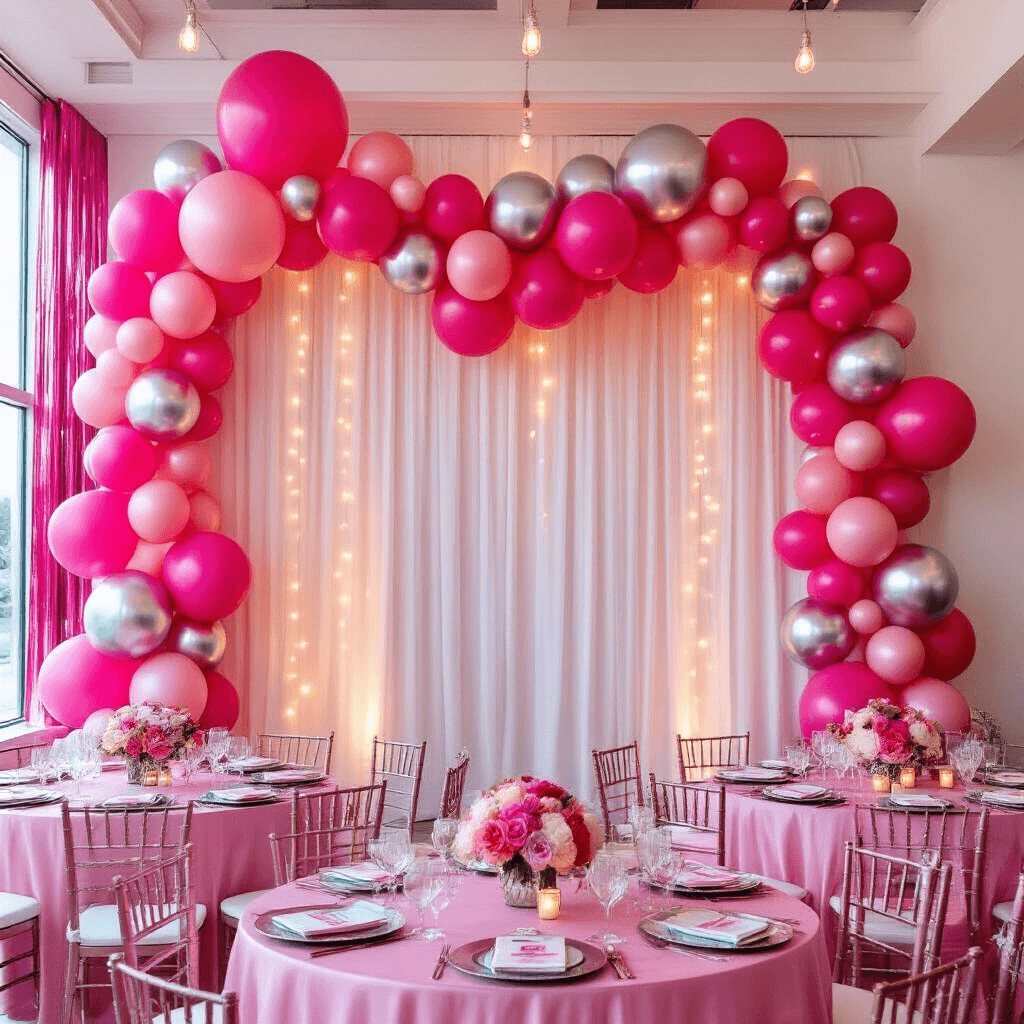
The Finishing Touches That Scream Barbie Glam
This is where good becomes absolutely spectacular.
Add These Show-Stoppers:
- Pink metallic fringe curtains hung underneath
- Starburst foil balloons for sparkle accents
- Custom Barbie signage or cutouts
- Strategic lighting to highlight the metallic elements
I once added battery-powered LED string lights woven through the garland. The birthday girl literally gasped when she saw it.
When DIY Isn’t Your Thing: Smart Shopping Alternatives
Sometimes life gets crazy, and that’s perfectly okay.
Pre-Made Options That Don’t Break the Bank:
- Etsy shops offer custom garlands from 4-16 feet
- Local balloon artists often do installations
- Party


